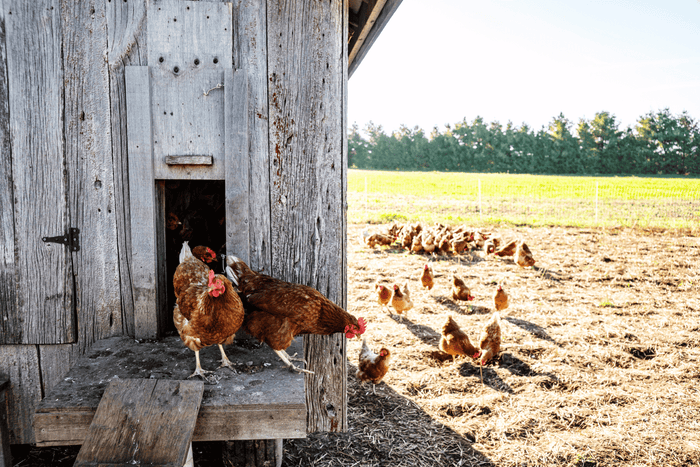
Keeping Mites, Lice, and Other Pests at Bay

Raising backyard chickens can be incredibly rewarding, providing fresh eggs and endless entertainment. But with the joy of keeping chickens comes the responsibility of ensuring their health and well-being. One of the most common challenges chicken owners face is dealing with pests like mites, lice, and other unwelcome guests. These tiny nuisances can cause significant discomfort and health issues for your flock if not managed properly. Let’s explore how to prevent and treat these pests to keep your chickens healthy and happy.
Understanding Common Chicken Pests
Before diving into prevention and treatment strategies, it’s important to understand the common pests that can affect chickens. The main culprits are mites and lice, but other pests like flies and rodents can also be problematic.
Mites
Mites are tiny arachnids that can cause big problems. They come in several varieties, but the most common ones affecting chickens are the red mite and the northern fowl mite.
- Red Mites: These mites live in the coop during the day and come out at night to feed on your chickens' blood. They can cause severe anemia and stress in chickens, and if left untreated, they can lead to death.
- Northern Fowl Mites: Unlike red mites, these mites live on the chicken continuously, feeding on their blood and causing discomfort and feather loss. They can reproduce rapidly, making infestations tough to control.
Lice
Chicken lice are different from mites in that they don’t suck blood but feed on the skin and feather debris. The most common type is the chicken body louse. Lice cause itching and feather damage, leading to restless chickens and decreased egg production.
Other Pests
In addition to mites and lice, chickens can be troubled by flies, which can spread disease, and rodents, which can contaminate feed and damage the coop.
Preventing Pests
The best way to deal with pests is to prevent them from becoming a problem in the first place. Here are some strategies to keep your coop and chickens pest-free.
Keep the Coop Clean
A clean coop is less inviting to pests. Regularly clean out bedding and remove droppings. At least once a month, do a deep clean, removing all bedding and scrubbing down surfaces with a safe disinfectant.
- Daily Tasks: Remove droppings and any soiled bedding.
- Weekly Tasks: Replace old bedding and check for signs of pests.
- Monthly Tasks: Do a thorough clean of the entire coop, including walls and nesting boxes.
Dust Baths
Chickens love to take dust baths, and this behavior is one of their natural defenses against pests. Provide a designated dust bath area filled with dry soil, sand, and a bit of wood ash or diatomaceous earth. This helps chickens keep their feathers and skin free from pests.
Inspect Regularly
Regularly check your chickens for signs of pests. Look under their wings, around the vent, and through their feathers. Early detection can make treatment much easier. Also, inspect the coop for signs of red mites, which might hide in crevices and cracks during the day.
Treating an Infestation
Even with the best prevention, sometimes pests can find their way into your coop. Here’s how to tackle them effectively if you find mites, lice, or other pests on your chickens or in their living area.
Treating Mites
-
Identify the Infestation: First, confirm the presence of mites. Look for them in the coop at night with a flashlight or examine your chickens closely for signs of mites during the day.
-
Clean and Treat the Coop: Remove all bedding and thoroughly clean the coop. Use a poultry-safe insecticide to spray all surfaces, paying special attention to cracks and crevices where mites hide. Follow up with diatomaceous earth, which can help deter mites from returning.
-
Treat the Chickens: Dust your chickens with a poultry-safe mite powder or use a spray specifically designed for poultry. Repeat the treatment according to the product’s instructions to ensure you kill all the mites, including those that might hatch from eggs.
Treating Lice
-
Check for Lice: Look for lice and nits (lice eggs) on your chickens, especially around the vent and under the wings.
-
Dust the Chickens: Use a lice powder or spray designed for poultry, ensuring you get the product down to the skin where the lice live. Repeat as needed to break the life cycle of the lice.
-
Clean the Coop: Like with mites, clean the coop thoroughly to remove any lice or eggs that may be lurking in the bedding or on surfaces.
Other Pests
- Flies: Use fly traps and keep the coop clean and dry. You can also use fly predators, tiny parasitic wasps that lay their eggs in fly larvae, effectively controlling the fly population.
- Rodents: Keep feed stored in rodent-proof containers and seal any holes or gaps in the coop. Use traps if necessary, but ensure they are safe to use around chickens.
Supporting Your Chickens During Treatment
Treating pests can be stressful for your chickens, so providing extra care and support is important during this time.
Boost Nutrition
Pests like mites and lice can weaken your chickens, so boosting their nutrition can help them recover faster. Provide a high-quality feed and consider adding supplements like vitamins and electrolytes to their water to support their immune system.
Minimize Stress
Handling and treating your chickens can be stressful for them. Try to minimize handling to only what's necessary and keep the environment calm. Providing familiar and comfortable surroundings will help reduce stress.
Monitor Health
Keep a close eye on your flock during and after treatment. Look for signs of improvement and ensure the pests are being effectively managed. If you notice any persistent health issues, consult a vet for further advice.
Long-Term Pest Management
Keeping pests at bay requires ongoing effort. Here are some long-term strategies to maintain a healthy, pest-free environment for your chickens.
Regular Maintenance
Continue regular cleaning and inspections to catch any potential pest issues early. Keeping the coop and surrounding area clean and dry will make it less inviting to pests.
Rotate Bedding
Consider using a deep litter method where you regularly add fresh bedding on top of old bedding. This can create beneficial composting conditions that deter pests. However, you’ll still need to do periodic deep cleans to keep everything fresh and healthy.
Use Natural Repellents
Incorporate natural pest repellents into your coop maintenance. Herbs like mint, rosemary, and lavender can help deter pests when scattered in the coop or added to nesting boxes. Diatomaceous earth sprinkled around the coop and in dust baths can also be an effective deterrent for many pests.
Conclusion
Dealing with pests is an inevitable part of raising backyard chickens, but with proactive management, you can keep mites, lice, and other nuisances under control. By maintaining a clean and well-managed coop, supporting your chickens’ health, and being vigilant about inspections and treatments, you can ensure your flock stays healthy and productive. Remember, a happy, pest-free chicken is a productive chicken, and taking these steps will keep your backyard flock thriving.